Nest Outdoor Cameras help secure your home. Installation is straightforward and efficient.
In this guide, we explore the easy steps for setting up your Nest Outdoor Camera. Whether you’re upgrading security or trying it for the first time, understanding the installation process is crucial. This camera offers top-notch features like motion detection and night vision.
It’s designed for reliable performance in various weather conditions. Installing it correctly ensures optimal function and peace of mind. We’ll cover everything from choosing the right spot to connecting it to your Wi-Fi. This will help you get the most out of your investment. Let’s dive into the essentials for setting up your Nest Outdoor Camera, ensuring your property stays safe and monitored.
Choosing The Right Location
Choosing the right location for your Nest Outdoor Camera is crucial for maximizing its effectiveness. Your camera’s placement can determine how well it monitors your property and how easily it connects to power sources. An ideal spot ensures you capture the necessary footage without compromising on installation convenience. Let’s dive into the essential factors for selecting the perfect location.
Assessing Coverage Area
Imagine you’re setting up your camera to watch over your driveway. You want to ensure it covers the entire area, capturing every potential angle of entry. Walk around and consider where people or vehicles usually come from. Think about blind spots—are there any corners or areas that might be missed? Adjust your camera’s angle to cover these spots effectively.
Think about the distance. If your camera is too far from the action, it might miss details. Yet, too close might limit the view. Strike a balance between proximity and wide coverage. Consider obstacles like trees or sheds that might block the view. Wouldn’t it be frustrating to miss a crucial moment because of an obstructed camera?
Considering Power Source
Every camera needs a reliable power source. How close is your chosen location to an outlet? Avoid locations where reaching a power source seems impossible or requires extensive cabling. Long cables can be cumbersome and might even pose a safety risk.
Think about how weather might affect power access. If your camera is exposed to rain, ensure the power connections are protected from water. Ever had an outdoor light flicker during a storm? That’s a sign of a poor setup. Keep your camera’s power source stable and secure.
Solar-powered options can be a game-changer. Have you considered how much sunlight your chosen spot gets? Opt for locations that receive ample sunlight throughout the day. This can offer more flexibility in placing your camera away from traditional power sources.
Choosing the right location involves careful consideration of coverage and power access. Where will you place your camera to ensure it captures everything you need without power issues?
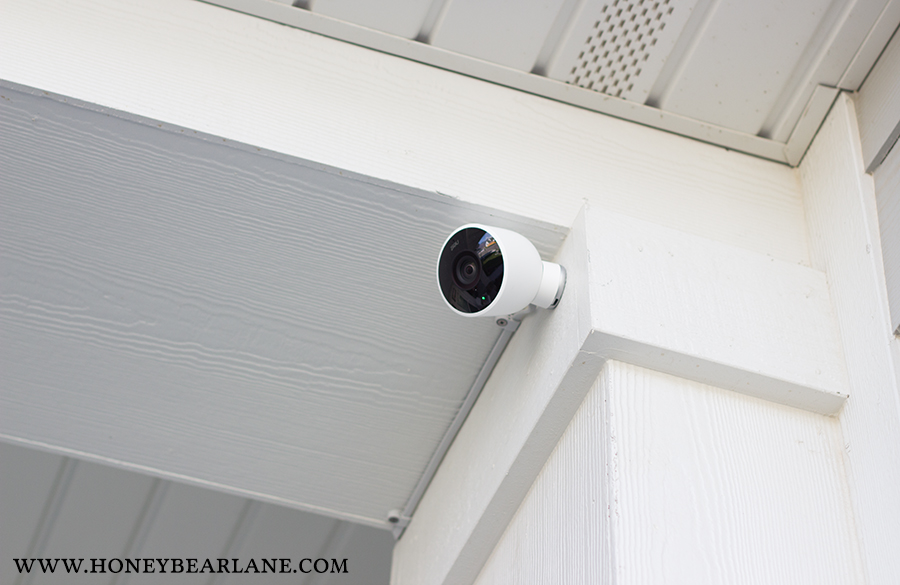
Credit: www.honeybearlane.com
Gathering Necessary Tools
Preparing for Nest Outdoor Camera installation involves gathering essential tools. A screwdriver, ladder, and power drill are necessary. Ensure you have Wi-Fi details handy for easy setup.
Installing a Nest Outdoor Camera can be an exciting project that enhances the security of your home. Before you start, gathering the right tools is crucial. Imagine getting halfway through the installation only to realize you’re missing a key tool. That can be frustrating. By preparing in advance, you ensure a smooth installation process. Let’s dive into what you’ll need to gather.Basic Tools Required
First, gather the basic tools. A Phillips screwdriver is essential for securing the camera in place. Make sure to have a drill with the correct drill bits for your wall type. Whether you’re mounting on wood, brick, or vinyl siding, having the right drill bit will make your job easier.You’ll also need a ladder if you’re installing the camera high up. This might seem obvious, but double-check that your ladder is in good condition. An old, wobbly ladder can be a safety hazard.Lastly, grab a pencil for marking where you’ll drill holes. This simple tool ensures you don’t make any mistakes in measurements.Safety Equipment
Safety should always be your priority. Have a pair of safety goggles to protect your eyes from dust and debris when drilling. A tiny speck can cause a lot of irritation, and safety goggles are a simple way to avoid that.Consider using gloves to protect your hands. They provide a better grip on tools and can prevent blisters, especially if you’re not used to handling a drill for long periods.A hard hat might seem excessive, but if you’re working above your head, it’s a smart precaution. Falling tools or debris can cause unexpected injuries, and wearing a hard hat is an easy way to protect yourself.Are there any tools you often forget until the last minute? Preparing a checklist can help ensure you’re fully equipped. Gather these tools and equipment in advance to make your Nest Outdoor Camera installation smooth and efficient.Setting Up The Nest App
Installing the Nest Outdoor Camera opens a world of security possibilities. To maximize its potential, setting up the Nest app is crucial. This guide helps you navigate the app setup effortlessly. Start by downloading the app, then create a Nest account to unlock features.
Downloading The App
The first step is downloading the Nest app on your smartphone. It’s available on both Android and iOS platforms. Search for “Nest app” in your app store. Tap “install” and wait for the download to complete. Ensure your device has enough storage space to accommodate the app.
Once installed, locate the app icon on your home screen. Tap to open. The app will prompt you to accept permissions. Allow access to features like your camera and microphone. This ensures the app functions optimally with your Nest Outdoor Camera.
Creating A Nest Account
Creating a Nest account is simple. Open the app and click “sign up.” Enter your email address and create a password. Choose a strong password to protect your account.
Fill in the required information. This includes your name and phone number. Agree to the terms and conditions. Tap “create account” to finish.
With your Nest account active, you can link your camera. Follow on-screen instructions to connect your camera to the app. Enjoy enhanced security features right at your fingertips.
Credit: www.safewise.com
Mounting The Camera
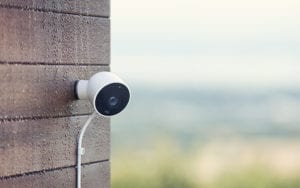
Mounting your Nest Outdoor Camera is a crucial step. It ensures optimal surveillance. Proper installation enhances security and coverage. Follow these simple steps for success.
Preparing The Wall
First, choose a suitable location for mounting. Consider areas with clear views. Avoid obstacles like trees or buildings. Ensure the surface is sturdy and smooth. This ensures the camera’s stability.
Gather necessary tools like a drill and screws. These make the process easier. Mark the spots for drilling holes. Use a pencil for accuracy. Double-check measurements before proceeding.
Securing The Bracket
Attach the bracket firmly to the wall. Use the screws provided. This is crucial for stability. Ensure the bracket is level. It prevents tilting and uneven views.
Test the bracket’s strength. Gently pull to check security. It should not move. A secure bracket supports the camera properly.
Connecting To Wi-fi
Setting up the Nest Outdoor Camera involves connecting to Wi-Fi for seamless monitoring. Ensure the camera is near the router for a strong signal and smooth installation. Follow the app instructions to link your device, ensuring secure and reliable performance.
Connecting your Nest Outdoor Camera to Wi-Fi ensures seamless video streaming and alerts. The Wi-Fi connection allows you to access your camera remotely. Before proceeding, ensure you have your Wi-Fi network name and password ready. A strong and stable Wi-Fi signal is essential for optimal performance.Selecting The Network
First, power on your Nest Outdoor Camera. Open the Nest app on your smartphone. Navigate to the settings menu to start the setup. Choose the option to add a new device. The app will prompt you to select a Wi-Fi network. Your camera should display available networks. Choose the correct network from the list. Ensure it is your home network and not a guest network. Enter the Wi-Fi password carefully. Confirm the connection to proceed.Troubleshooting Connectivity Issues
Facing trouble connecting? Check the Wi-Fi signal strength. Ensure your camera is within range of the router. Avoid physical obstructions like walls and metal objects. If the connection fails, restart your router and camera. Reopen the app and try connecting again. Verify that your Wi-Fi password is correct. Consider resetting the camera to factory settings. Repeat the setup process from the beginning. If issues persist, consult the Nest support team. They can provide further assistance.Adjusting Camera Settings
Adjusting the settings of your Nest Outdoor Camera enhances security. These settings allow you to customize alerts, video quality, and more. Proper configuration ensures you get the most from your device.
Configuring Alerts
Alerts notify you of activity around your home. Customize these notifications to suit your needs. You can set alerts for motion or sound. Choose the areas you want monitored. This helps you focus on important zones. Adjust sensitivity to prevent false alarms. Fine-tuning alerts improves your camera’s efficiency.
Setting Video Quality
Video quality affects storage and clarity. Nest Camera offers various quality options. Choose between high-definition or standard settings. High-definition provides clearer images. Standard quality saves storage space. Consider your internet speed when selecting quality. Balancing quality and storage optimizes performance. Ensure smooth streaming by selecting the appropriate setting. This choice impacts both image detail and data usage.
Testing The Camera
Setting up the Nest Outdoor Camera involves simple steps. Connect it to Wi-Fi and secure it in place. Ensure clear visibility to test the camera’s features effectively.
Testing your Nest Outdoor Camera is a crucial step to ensure that it functions correctly and meets your expectations. After spending time and effort installing it, you want to ensure it’s working as it should. Testing allows you to confirm that all features are operational and gives you peace of mind knowing your home is secure.Checking Video Feed
Once your camera is up and running, it’s time to check the video feed. Open the Nest app on your smartphone or tablet. Navigate to the live feed section to view real-time footage from your camera.Do you see a clear image? If not, consider adjusting the camera’s angle or cleaning the lens. A slight tweak can make a significant difference in video quality.Also, check the video quality settings within the app. Sometimes, tweaking these settings can enhance the clarity of your footage.Ensuring Motion Detection
Motion detection is a key feature of the Nest Outdoor Camera. It alerts you to any activity around your property. To test this, walk in front of your camera and see if you receive a notification on your device.If you don’t get an alert, check your motion detection settings in the app. Make sure it’s enabled and set to a sensitivity level that suits your needs.Is there a delay in notifications? If yes, try adjusting the Wi-Fi settings or repositioning your router to improve connectivity.Testing each feature thoroughly ensures your Nest Outdoor Camera provides the security you need. Have you tested your camera yet? If so, what tweaks did you find necessary?
Credit: www.youtube.com
Maintenance Tips
Enhance security by installing the Nest Outdoor Camera. Ensure strong Wi-Fi for optimal performance. Regularly clean the lens for clear images. Secure mounting prevents damage and loss. Consider weather conditions when positioning for reliable functionality.
When you install a Nest Outdoor Camera, you want it to function optimally for as long as possible. Regular maintenance can ensure your camera stays in top condition, providing you with the security and peace of mind you need. Whether it’s keeping the lens clean or ensuring the firmware is updated, these maintenance tips are simple yet effective. Let’s dive into some practical ways to keep your Nest Outdoor Camera in great shape.Cleaning The Lens
A clear lens is crucial for capturing sharp video footage. Dust, rain, and other outdoor elements can cloud the camera’s view. Regularly check the lens for any dirt or smudges.Use a soft microfiber cloth to gently wipe the lens. Avoid using harsh chemicals as they can damage the lens coating. A little water or lens cleaner can help remove stubborn spots.Consider setting a monthly reminder to clean your camera. This way, you’ll maintain a clear view and catch any potential issues early. Have you ever missed an important moment because of a smudged lens? Don’t let that happen again!Updating Firmware
Keeping your camera’s firmware updated ensures it runs smoothly and securely. Updates often include new features, bug fixes, and security improvements. Check for firmware updates regularly.Access the Nest app on your smartphone to see if there are any pending updates. It’s a straightforward process, usually just a few taps to install the latest version.Updating firmware might seem like a chore, but it’s vital for your camera’s performance. Imagine missing out on a new feature that could enhance your security setup. Why not take a few minutes to check for updates today?By following these maintenance tips, your Nest Outdoor Camera will serve you well. Regular cleaning and updates not only prolong the camera’s life but also improve your security experience. Are you ready to give your camera the care it deserves?Frequently Asked Questions
Is The Nest Outdoor Camera Being Discontinued?
Google has discontinued the Nest outdoor camera. Check their website for updated product offerings and alternatives. Consider exploring other security camera options available in the market.
How Do I Connect My Nest Outdoor Camera To Wi-fi?
Connect your Nest outdoor camera to Wi-Fi using the Nest app. Open the app, select your device, and follow on-screen instructions to add your camera. Ensure the camera is near your router for a strong connection. Use the same Wi-Fi network your phone is connected to for seamless setup.
How Do I Keep My Nest Camera On All The Time?
Ensure your Nest camera is plugged into a reliable power source. Disable any energy-saving settings. Access the camera’s app settings to confirm continuous streaming is enabled. Regularly update the app for optimal performance.
What Keeps Someone From Stealing A Nest Camera?
Nest cameras are securely mounted and require tools for removal. They have motion detection alerts and video recording capabilities. These features deter thieves by capturing evidence. Additionally, the Nest app provides real-time notifications, increasing the chance of catching or deterring potential thieves.
Conclusion
Installing the Nest Outdoor Camera is straightforward and rewarding. You gain peace of mind. Your home security improves significantly. The camera’s smart features are user-friendly. Quick alerts keep you informed. Easy integration with other devices enhances convenience. Clear video quality ensures you see everything clearly.
This device helps protect your loved ones. It’s a solid investment for your home’s safety. Enjoy the benefits of a secure environment. Take the step towards better security. Your home deserves the best protection. Start today for a safer tomorrow.


