Discover the best way to install a network switch. Follow our detailed guide for a smooth and reliable network setup, perfect for any environment.
A network switch is essential for managing data traffic in homes or offices. It allows devices to communicate efficiently within a local network. Whether setting up a small home office or a large enterprise network, knowing how to install a network switch is crucial.
This guide will walk you through the steps to ensure a smooth installation. By the end, you’ll have a clear understanding of how to set up your network switch, ensuring seamless connectivity for all your devices. Let’s get started!
Introduction To Network Switches
Network switches are essential devices in modern networks. They connect multiple devices within a local area network (LAN). Switches help manage data traffic efficiently. They ensure that data packets reach the correct destination.
Purpose And Benefits
A network switch serves several purposes:
- It connects multiple devices, such as computers and printers.
- It enhances network performance by reducing congestion.
- It improves security by segmenting the network.
Benefits of using a network switch:
- Increased bandwidth: Each device gets dedicated bandwidth.
- Reduced latency: Faster communication between devices.
- Scalability: Easy to add more devices as your network grows.
Types Of Network Switches
There are different types of network switches, each with unique features:
| Type | Description |
|---|---|
| Unmanaged Switches | Simple and easy to use. No configuration is required. |
| Managed Switches | Offers advanced features. Provides greater control over network traffic. |
| Smart Switches | Combines features of unmanaged and managed switches. Suitable for small to medium businesses. |
Unmanaged switches are plug-and-play devices. They work out of the box. Managed switches require configuration. They offer features like VLANs and QoS. Smart switches are a middle ground. They provide some management features without complexity.

Gathering Necessary Equipment
Before installing a network switch, gathering the necessary equipment is crucial. This ensures a smooth installation process. You need the right tools and switches for your network needs. Let’s break it down step by step.
Required Tools
First, collect the essential tools. You will need an Ethernet cable tester. This helps in verifying the connections. Have a set of screwdrivers on hand. They come in handy for securing the switch. Don’t forget cable ties. They help in organizing the cables neatly. A label maker can be useful for tagging cables. This keeps everything organized.
Choosing The Right Switch
Selecting the right switch is vital. Determine the number of devices in your network. Choose a switch with enough ports to connect all devices. Consider the switch’s speed. For most home networks, a gigabit switch is suitable. Think about managed vs. unmanaged switches. Managed switches offer more control. Unmanaged switches are easier for beginners. Assess your network needs and make an informed choice.
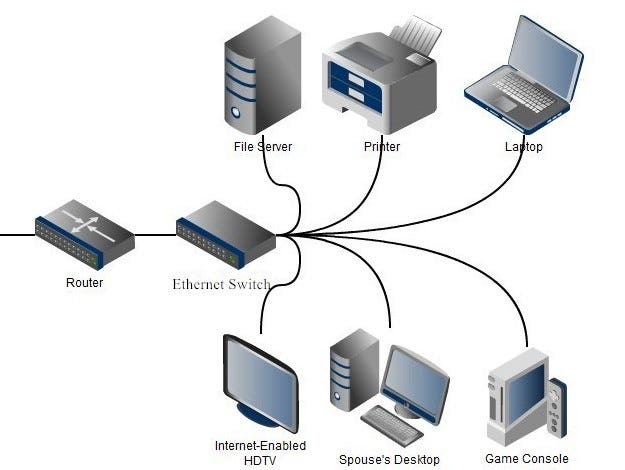
Planning The Network Layout
Planning the network layout is crucial for installing a network switch. Position switches centrally for optimal performance and easy access. Ensure cables are organized and labeled for maintenance.
Planning the network layout is a crucial step in installing a network switch. A well-thought-out layout ensures efficiency, minimizes downtime, and supports scalability. Understanding your network’s needs and mapping connections are key parts of this process.
Assessing Network Needs
Begin by determining the number of devices that need a connection. This includes computers, printers, and servers. Count each device to know the exact number of ports required. Consider future growth. Plan for extra ports to avoid running out later. Check the types of devices. Some may need higher bandwidth. Knowing this helps in choosing the right switch.
Mapping Out Connections
Create a diagram of your network layout. Start by placing the switch in a central location. This reduces cable lengths and keeps things organized. Draw lines to represent cables from the switch to each device. Label each line with the device name. This visual aid helps in planning and troubleshooting later. Ensure each device has a clear path to the switch. Avoid overlaps to keep the layout clean.
Credit: medium.com
Preparing The Installation Site
Before you install a network switch, you must prepare the installation site. This ensures your network switch runs smoothly and efficiently. Follow these steps to create an optimal environment for your network switch.
Ensuring Proper Ventilation
Proper ventilation is crucial for maintaining your network switch. Excess heat can damage your equipment. Follow these guidelines to ensure proper ventilation:
- Place the switch in a cool, dry area.
- Ensure there is at least 2 inches of space around the switch.
- Use fans or cooling systems if necessary.
Avoid placing the switch near heat sources or in direct sunlight. Proper ventilation helps your network switch last longer and perform better.
Setting Up Mounting Options
Mounting your network switch securely is important. Whether you use a rack or a shelf, follow these steps:
- Choose a sturdy and stable mounting option.
- Use the mounting brackets provided with your switch.
- Secure the switch to the rack or shelf using screws.
If you use a rack, ensure it is properly grounded. This prevents electrical interference. Proper mounting ensures your network switch stays in place and operates efficiently.
By following these steps, you prepare your installation site for a network switch. This ensures optimal performance and longevity of your equipment.
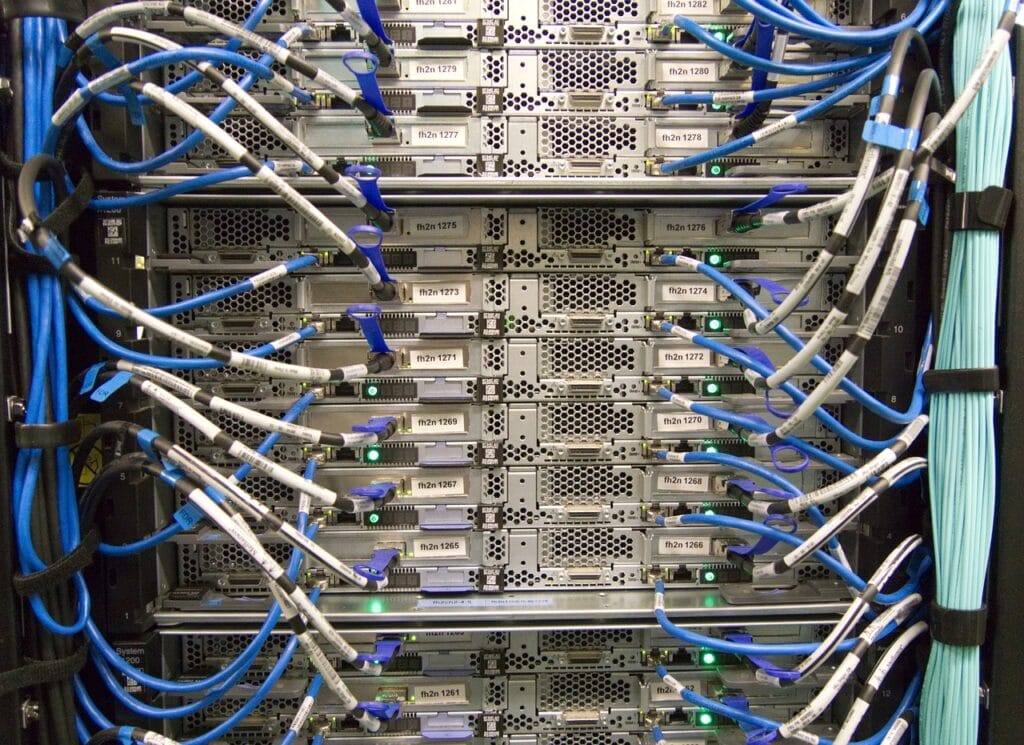
Connecting The Network Switch
Connecting a network switch is a crucial step in setting up your network. This section will guide you through powering up the switch and connecting network cables. Follow these steps carefully to ensure proper connection and functionality.
Powering Up The Switch
First, locate the power adapter that came with your switch. Plug the power adapter into an electrical outlet. Next, connect the other end of the adapter to the switch’s power port.
Once connected, the switch’s power LED should light up. This indicates that the switch is receiving power. If the LED does not light up, check the power connections and try again.
Connecting Network Cables
Now, it’s time to connect your network devices to the switch. Use Ethernet cables for this task. Each device should have its own Ethernet cable.
Follow these steps to connect your devices:
- Identify the Ethernet port on each device.
- Plug one end of the Ethernet cable into the device’s port.
- Plug the other end of the Ethernet cable into an available port on the switch.
Repeat these steps for each device you want to connect to the network switch. Ensure all connections are secure.
After connecting the devices, observe the switch’s activity LEDs. These LEDs should blink, indicating successful data transfer.
Refer to the table below for a quick summary:
| Step | Action |
|---|---|
| 1 | Plug the power adapter into the outlet and switch |
| 2 | Verify power LED is on |
| 3 | Connect the Ethernet cable to the device and switch |
| 4 | Check activity LEDs for data transfer |
By following these steps, you can ensure that your network switch is properly connected and ready for use.

Credit: www.youtube.com
Configuring The Switch
Configuring a network switch can seem daunting, but it’s an essential task. Proper configuration ensures that your network runs smoothly. Let’s dive into the steps you’ll need to follow.
Accessing The Switch Interface
First, connect your computer to the switch using an Ethernet cable. Open your web browser and enter the switch’s IP address in the address bar. You might need to refer to the switch’s manual to find this IP address. Once you have the IP address, press Enter. You should see a login screen. Enter the default username and password. These details are usually found in the manual or on a label on the switch.
Basic Configuration Steps
After logging in, you’ll see the switch’s web interface. Start by setting a new password. This makes your switch secure. Next, assign a unique IP address to the switch. This ensures it doesn’t conflict with other devices on the network. Then, configure VLANs (Virtual LANs) if needed. VLANs help segment your network for better performance.
Finally, save your settings. Look for a “Save” button or similar option. Your switch is now configured and ready to use. Regularly check the interface to monitor the switch’s performance and make adjustments as needed.
Testing The Network Switch
Testing the network switch ensures your devices communicate smoothly. This step verifies that your setup works efficiently and identifies any connectivity issues. Follow these steps to test your network switch.
Checking Connectivity
Start by checking the physical connections. Ensure all cables are securely plugged in.
- Verify the power cable is connected to the switch.
- Check each Ethernet cable is firmly inserted.
- Look for LED lights on the switch. These indicate active connections.
Next, use a computer to test the connection. Open the command prompt and type:
ping 192.168.1.1Replace 192.168.1.1 with the IP address of your switch. If you receive replies, the switch is connected properly.
Common Issues
If you face issues, troubleshoot using these common problems and their solutions:
| Issue | Solution |
|---|---|
| No LED lights | Check the power connection. Ensure the outlet works. |
| Intermittent connection | Replace the Ethernet cables. Inspect for damage. |
| No internet access | Ensure the modem is connected to the switch. Restart the modem. |
Test each port on the switch by connecting different devices. Ensure each device has internet access and can communicate with others. Use network diagnostic tools for advanced testing. These tools provide detailed information about the network’s performance.
Maintaining The Network Switch
Once you have installed your network switch, proper maintenance is crucial. This ensures smooth operation and long-term reliability. Let’s explore some key aspects to keep your switch in top shape.
Regular Monitoring
Regular monitoring is essential for the health of your network switch. Keep an eye on the following:
- Port Status: Check if all ports are functioning as expected.
- Traffic Load: Monitor traffic to avoid congestion.
- Error Rates: Look for unusual error rates that could signal problems.
- Temperature: Ensure the switch does not overheat.
Many network switches come with built-in monitoring tools. These tools can help you stay on top of these metrics.
Updating Firmware
Updating the firmware is vital. New firmware versions fix bugs and enhance performance. Follow these steps to update your switch’s firmware:
- Visit the manufacturer’s website for the latest firmware.
- Download the firmware file to your computer.
- Access the switch’s management interface.
- Navigate to the firmware update section.
- Upload the firmware file and start the update process.
Always back up the current configuration before updating. This helps to restore settings if something goes wrong.
By regularly monitoring and updating your network switch, you ensure optimal performance and longevity.
Frequently Asked Questions
What Is A Network Switch?
A network switch is a device that connects multiple devices on a network. It uses packet switching to forward data to the destination device. Switches improve network performance and efficiency.
How Do You Install A Network Switch?
To install a network switch, connect it to your router using an Ethernet cable. Then, connect your devices to the switch. Ensure the switch is powered on. Follow the manufacturer’s instructions for any additional configuration.
Do I Need A Managed Or Unmanaged Switch?
Choose a managed switch for advanced configuration, monitoring, and control. Unmanaged switches are simpler and more affordable. They are suitable for basic networking needs. Select based on your network’s complexity and requirements.
What Cables Are Needed For A Network Switch?
You need Ethernet cables, typically Cat5e or Cat6, to connect devices to the switch. Ensure the cables are of good quality. Use appropriate lengths to avoid clutter and maintain signal quality.
Conclusion
Installing a network switch is simpler than it seems. Start with the right tools. Follow the step-by-step guide carefully. Connect the cables securely. Ensure all devices are powered on. Check for proper functioning. Troubleshoot any issues promptly. Enjoy a smoother and faster network.
Remember to keep your switch firmware updated. Regular maintenance is key. With these tips, your network will run efficiently. Happy networking!